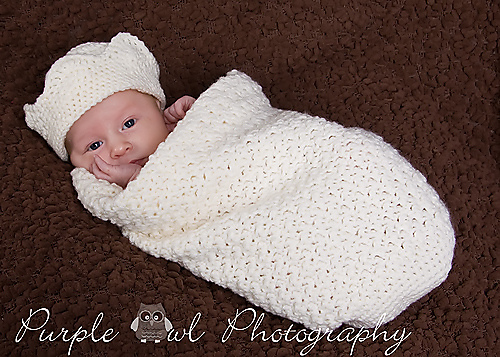


Finished the sweater & hat!! Going to take it over to Julie Harbert's of Purple Owl Photography a bit later this afternoon for a photo shoot before I ship it out. Thank you for following along! If you would like to order your own sweater & hat, e-mail me at dsrtdmnd@gmail.com


28 Feb 2010
Got the hat finished. The final step is to embroider on the snowmen detail.

28 Feb 2010
Got the sleeves sewn on and all the loose ends tucked in. The next and final step for the sweater is to embroider the snowmen details however, before I do that with the sweater I am going to make the hat first and do all the embroidery to both items at the end.


27 Feb 2010
Got the sleeves done. Now I need to turn everything inside out again, sew the sleeves in place, tuck in all the ends, and turn right-side out.

27 Feb 2010
I went ahead and did the waist band after the collar to save some time and pictures. Here is the vest with the collar and waistband completed. There are three steps left to go to complete the sweater. Sleeves, tuck in all ends, and snowmen details. I am going to wait to do the snowmen until I have the hat finished so that I can do all the snowmen at one time.

27 Feb 2010
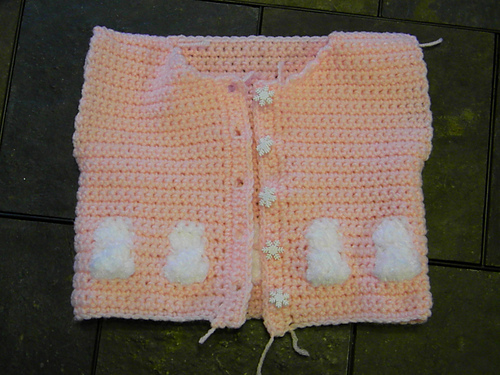
Once the button bands are done, sew the buttons in place and ensure they fasten properly. This is usually a problem spot for me in projects but I got it in the first try this time! With the snowflake buttons, I find that the pattern instructions for the button holes is a bit incorrect. Instead of using only one chain, I use three. This way the points of the snowflakes don't snag as much on the sweater. With only a one chain button hole, the snowflake edges get stuck and snag on other parts of the sweater. Making the button hole slightly larger, helps to significantly reduce this problem. The next step is the collar.

27 Feb 2010
Once you get the top shoulder seams sewn, turn the sweater right side out again and examine the seams to make sure they are good. Now we have a cute little snowman vest! The next step according to the instructions is to do the snowmen detail but I like to save that for the very last step so I am going to skip that part for now. Next we will make the button bands on the front of the sweater where we will attach the snowflake buttons.


27 Feb 2010
Finished the second front side of the sweater. The next step is to sew the top of the shoulder seams to the back of the sweater. This will create a "vest". I like to do this with the garment inside out. That creates the seam on the inside of the sweater instead of on the outside.

27 Feb 2010
Finished the back piece. The next step is to do the second front side piece.

26 Feb 2010
Finished the first front side. The sweater is coming along nicely! The next step is to do the back panel. It is getting late so this is a great stopping point for me tonight. Check back tomorrow for more progress photos!


26 Feb 2010
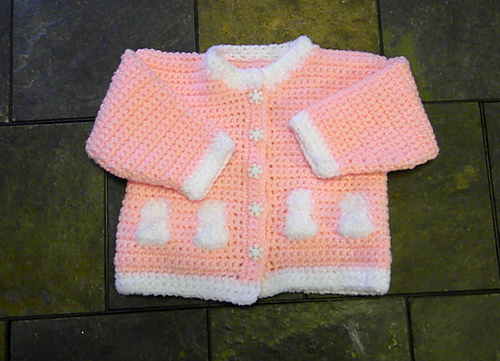
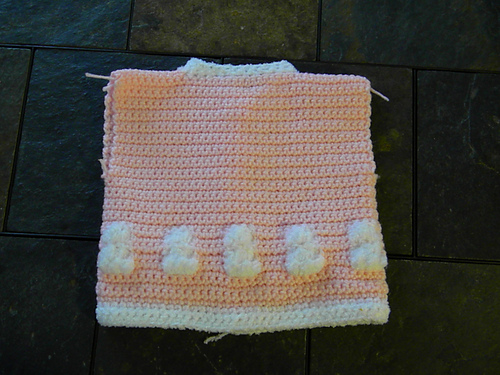
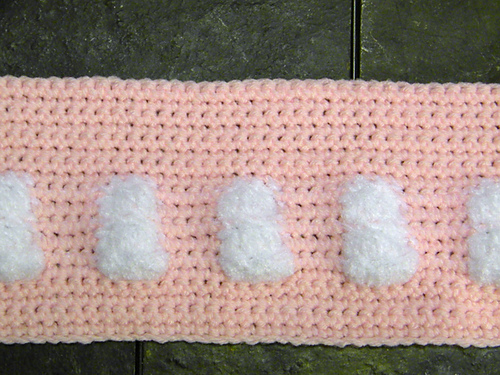
Finished the first section of the sweater. This is the first 18 rows with the snowmen completed. I am using Red Heart Super Saver "Baby Pink" for the sweater. The Snowmen are done in puff stitch using TLC Amore "White" for a soft and fluffy effect. The next step of the sweater is to work one of the front sides.

26 Feb 2010
Began the baby sweater today. Here is the picture of the first 4 rows. The next few rows will incorporate the snowmen around the bottom border of the sweater body. The customer requested the snowman sweater be made in "baby pink" instead of the "ocean" color that I typically use for the sweater. I can't wait to see how it comes out! Stay tuned for more photo updates as work progresses!